Showing posts with label Deck. Show all posts

Thursday, October 17, 2013

New Boxwoods {Planters & Window Boxes}

If you've been a follower of the blog you'll know that I have a thing for boxwoods. Mark my word, one day my entire yard will be rid of the dozens of day lilies and graceful boxwoods will take their place.

So when YiaYia tipped me off that Lowes was clearancing their garden center plantings all I could think was discounted boxwoods. And discounted they were. This cart full of 8 boxwoods and a 1/2 flat of pansies came in under $40.00!

Back home, a pair of boxwoods were put in urns and joined the large of boxwoods on the front steps.
I love the way the leathery, rich foliage pops against the cream trim and helps frame the front door.

Underneath the new topiaries I added seasonal color with delicate fall pansies. The pop of orange & yellow ties all the autumn hues together. I envision swapping out the floral seasonally for a fresh look.


As for the cart full of remaining boxwoods. Peanut flexed his 4.5 year old muscles and carried them all around back for me. Over the summer our deck boxes overflowed with white geraniums and herbs.  I transplanted some of the herbs and then the boxes were ready for the new boxwoods.

Before planting I arranged the plants in various orders and pairs to identify the best grouping. Then it was as simple as digging a hole.
For less than $10.00 per box I have a trio of topiaries to admire year round. And just like the front urns, it will be easy to add a seasonal touches to these boxes. 

I'm already dreaming up some lovely Christmas designs…oh boxwoods + mini white lights = perfection.


images my pinterest board


Wednesday, June 19, 2013

Deck Reveal


Out of all the makeovers we've completed in the house, second to the kitchen, the deck has to be my favorite. We tackled this project in two phases. Expanding the deck and adding a door from the kitchen was completed last year. We then spent that summer & fall out on the deck "living" in it and getting a feel for exactly how we wanted the space to function.


Once spring 2013 rolled around it was time for Phase two: the addition of furniture. We needed to accomplish several key objectives:
  • Comfortable table seating for 8.
  • Lightweight chairs the kiddies could easily maneuver.
  • Sturdy furniture to accommodate our multigenerational family. 
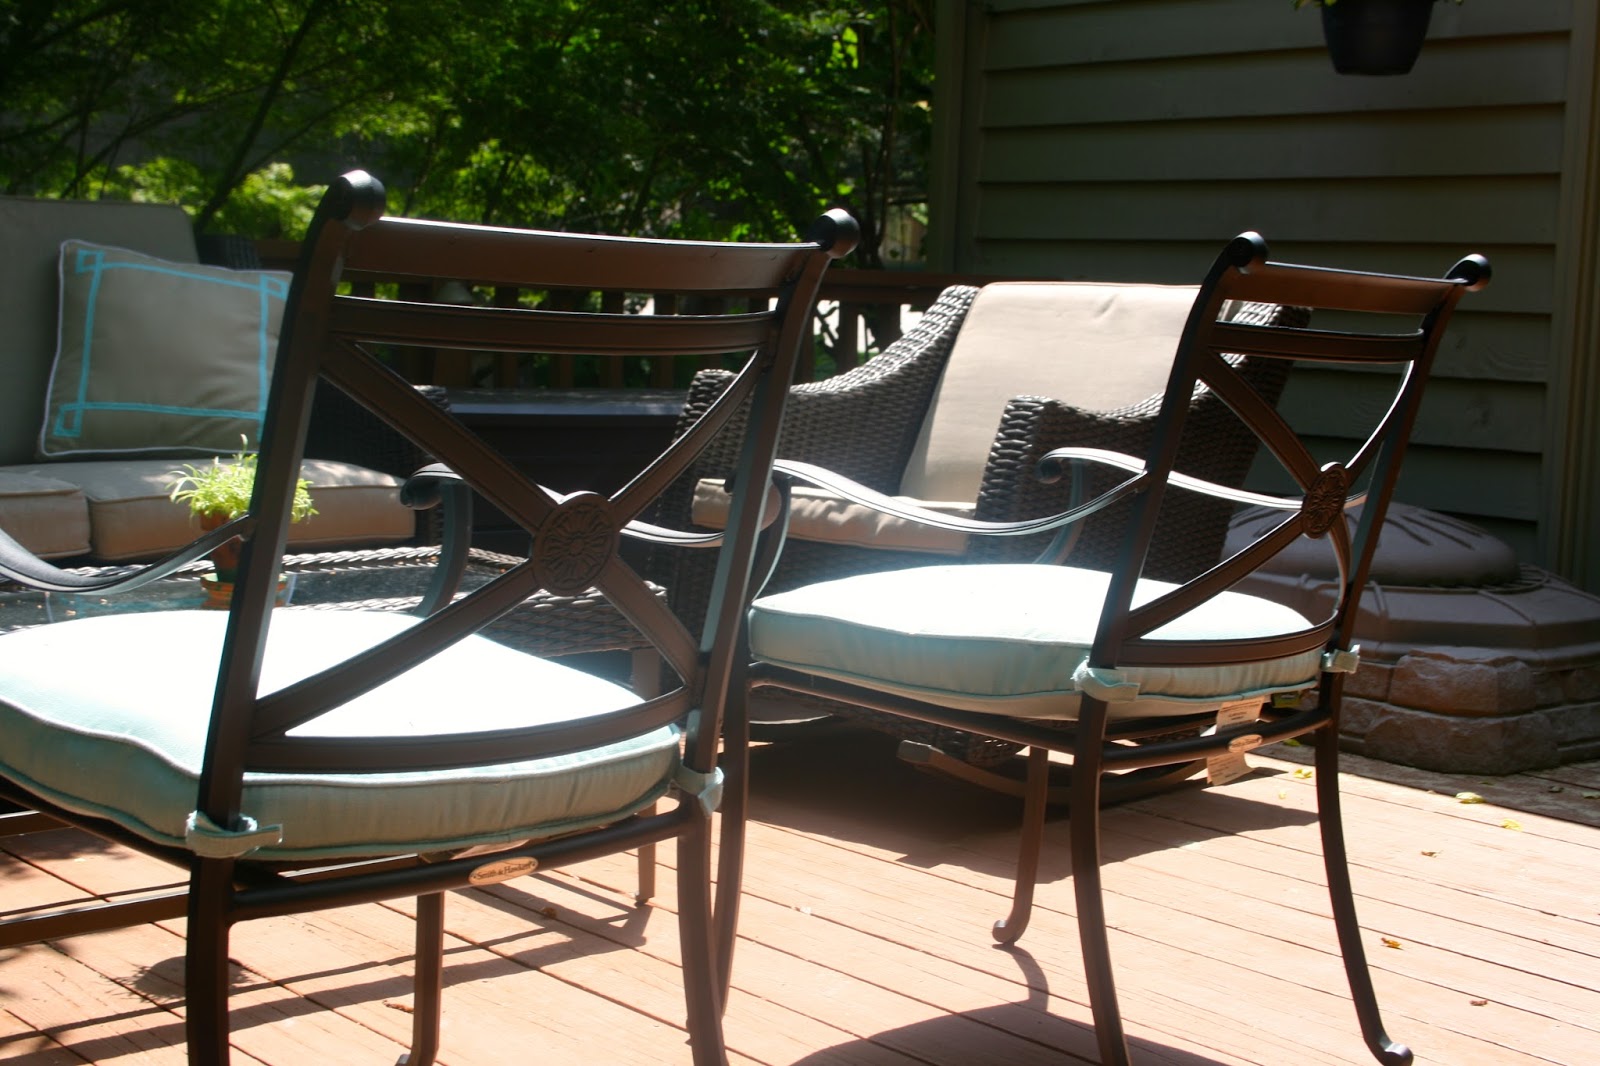
This table & chairs set satisfied both the seating requirement and my desire for a neoclassical style. The aluminum construction makes the chairs very lightweight and easy to move around the deck or carry into the yard for seating during pool/slip-n-slide time.


In the lounge area we opted for a full size sofa and club chair rockers in wicker; Hubby's preferred look. Throw pillows on the couch carry over the dining chair cushion color and unify the space. The look was easily accomplished by dressing up store bought pillows. You can read my fretwork pillow tutorial here. For the lumbar pillow, I removed the original embellishments and replaced them with a ruffle I fashioned from the basement drapes fabric remnants.


The best part of all is that I can lounge in the rocker with an ice tea or glass of wine and have a direct view of the littles on the swing set. 


When it comes to outdoor accessorizing white flowers fit the bill. From my favorite double impatient in the hanging basket to urns of white blooms surrounding the deck fountain. (Belle gifted it to Hubby on father's day back when she was 2 years old!) White flowers are the perfect accent. I even have them lining the deck staircase & railings.


I planted these pure white hydrangeas in the bed in front of the deck addition. My hope is they will eventually grow large enough to camouflage the deck footers. I'm thinking I might need a back up plan though. I'm not convinced they'll be happy under the gigantic river birch who's foliage provides shade for a good portion of the deck along with the swing set.


When planning the deck out on paper it was hard to judge how well the different styles of furniture would work together. Happily, the look is exactly was I was going for…..similar but not too matchy matchy. And the gentle pop of color in the chair cushions brings just enough contrast to the otherwise tonal color palette. The deck has become our own oasis and the kiddies beg to eat nearly every meal out here.


Most importantly though, our home now has an outdoor space where we can comfortably entertain our friends and family from the youngest to the oldest. With all three objectives satisfied I would have to say mission accomplished. Bring on the summer BBQs!


Tuesday, May 21, 2013

Fretwork Pillow Tutorial & Tips


Last week I posted about my love of fretwork. Well I am happy to report that my DIY fretwork pillows look pretty darn chic and rang up at a whopping $10 a piece. If you are interested in trying your hand at a pillow or two the picture tutorial below should give you the general idea of how I went about it. If you need specific questions answer just let me know:)

A few tips:
  • If using stitch witch, adhere the corners first & then iron the entire strip. When I ironed on my first strip the weight of the damp towel cause the originally straight line to become crooked. 

  • Use Steam A Seam rather than Stitch Witch because it will not move once placed on the pillow thereby eliminating the need for tip 1 & granting you a cleaner result.

  • If possible, adhere design onto pillow without the fill in it. Since my project was for outdoor use, my pillow was not a slipcover but it would have been an easier process if I could have attached the tape to a flat surface.

1


2


3


5


6


7


Tuesday, May 14, 2013

Crush Worthy {Fretwork)

With the end of school around the corner, I am rushing to finalize the deck throw pillows and call that project done. While brainstorming pillow designs I stumbled upon these bed linens. I don't think I've shared with you all how obsessed I am with fretwork. I just can not get enough of the chic and timeless style. And paired with a monogram it is utter perfection in my book.

This bedding is simply divine and I have fallen in love…head over heels. I never thought I would swoon over bedding until I laid eyes on this. Trust me, this is not the last you've seen of this linen. The master bedroom has yet to be touched and now I have an inspiration. It maybe a few years from now, but that's fine seeing as how I need all the time I can get to save for this beauty.


OK back to the deck, so in efforts to pinch my pennies and finish up this space I am going to attempt recreating the pillow pictured below.  Hopefully this will satisfy, all be it temporarily, my fretwork craving. I plan on using bias tape I stumbled upon while rummaging through YiaYia's sewing kit.  The two unopened packages of "cool island mint" bias tape are circa 1979. I kid you not, keep it long enough and it comes back in style…love ya mom!


Should my attempts fail (as a fair share of my DIYs do) I came across this $10 fretwork applique. It only comes in gold, which won't work for the deck project, but a little spray paint might just do the trick. Hopefully, though plan A will work out. I'll be sure to report back.

I'm off to HomeGoods this morning to locate linen colored outdoor pillows. Wish me luck shopping with two boys! I better pack lots of bribery snacks.